I finally spent some time to try to compile RubyCreator on Windows, I don’t use Windows and dislike it as a development environment so this is why it took so long, here I’ll describe the steps to get it compiled and working, in a near future I plan to do binary distributions for RubyCreator, so will be easy for Ruby Windows developers to get it.
While there is no binary distribution, you need to compile it yourself, so here is the slow and painful instructions, ok, not so painful, but requires a log of time and downloads.
Overview
To get it done you will need.
Patience, 1Kg is enough.
Download Microsoft Visual Studio Express 2013 (QtCreator binary distribution was compiled with it, so the plugins should use the same compiler).
Download Qt for Visual Studio 2013 (The huge package with 840Mb)
Get the QtCreator sources from somewhere or clone it from git (git@github.com:qtproject/qt-creator.git). Try to do a shallow clone to avoid download the whole QtCreator git history.
Compile QtCreator
Clone RubyCreator
Compile RubyCreator
Compiling QtCreator
As the QtCreator binary distribution does not come with all the data we need to be able to compile any plugin, you will need to compile QtCreator first.
Open the MSVC2013 Developer Command Prompt.
Add the Qt bin directory to the system path, so you can call qmake.
C:\> SET PATH=%PATH%;C:\Qt\Qt5.6.0\5.6\msvc2013\bin
Go to the directory you cloned QtCreator.
Checkout to the tag matching the version of QtCreator you want to compile, in this case same version of QtCreator you already have installed on your system.
Prepare to do a out of source build:
C:\...\QtCreator> cd ..
C:\...\> mkdir QtCreatorBuild
C:\...\> cd QtCreatorBuild
C:\...\QtCreatorBuild> qmake ..\QtCreator\qtcreator.pro
C:\...\QtCreatorBuild> nmake
Now go find something to do, because this will take some time.
Compiling RubyCreator
You are closer… just a few minutes.
Open the MSVC2013 Developer Command Prompt and make sure qmake is on system path like you did to compile QtCreator.
Go to directory you clonned RubyCreator.
Change to the branch that match the QtCreator version (qtc-3.6 for QtCreator 3.6.x).
Compile it :-)
C:\...\RubyCreator> cd ..
C:\...\> mkdir RubyCreatorBuild
C:\...\> cd RubyCreatorBuild
C:\...\RubyCreatorBuild> qmake QTC_SOURCE=..\QtCreator QTC_BUILD=..\QtCreatorBuild ..\RubyCreator\ruby.pro
C:\...\RubyCreatorBuild> nmake
The plugin is called Ruby.dll, you can find it somwwhere in the QtCreatorBuild among with other plugins, copy it to your QtCreator plugins directory, restart it and done.
Conclusions
Need to compile the entire QtCreator to just compile a small plugin is a pain in the ass, life would be easier if QtCreator packages had the necessary bits to compile plugins.
After almost 2 years I can say, “KDE, I’m back”. I used KDE3 during their entire life time, but KDE4 was horrible,
nothing worked well, the network manager applet was terrible and everything was a mess… plus slow as hell.
So in the meantime I was using a setup based on OpenBox plus many small applications, like the 90’s, everything
worked well and ultra fast! But the need to open a terminal and learn how to use xrandr just to attach a
external monitor without a reboot was also horrible… so I gave a try to KDE5 and it seems way better than KDE4, ok, kwin still slow and causing a lot of pain with the default configuration, but things are getting better.
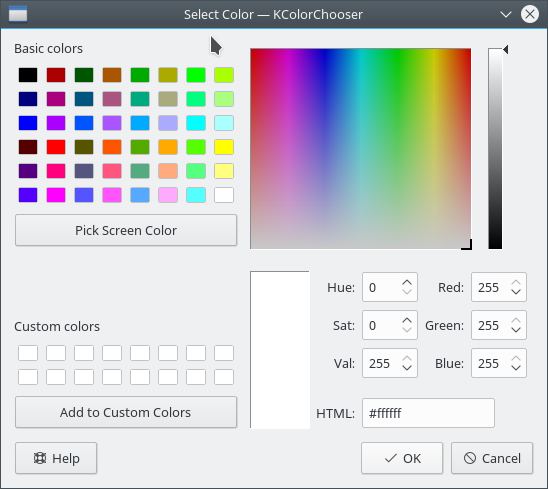
So… I tried to help KDE5 with something simple that would not waste my time spent in my pletora of pet projects, and the simple thing was a stupid application that I see myself using from time to time, KColorChooser, the application is nothing but a way to pick colors from screen, just that, so I ported it to KF5 :-), the application is really stupid so the port took some minutes, but the code review some weeks, here’s it, if you know Qt you will notice that it is just a QColorDialog with an extra help button.
That’s it, it will be released on KDE applications 16.04 IIRC :-)
If you are not alone on a project you probably have some kind of code review, if it’s not explicit at least someone will at some point see what you did and blame it.
There are plenty of code review tools out there, free, non free, too much simple, too much complex, etc… most of them didn’t attended my point of view of what a code review tool should be. In my point of view any tool should be just a tool, any good developer is too busy with the problems it must solve to waste time configuring, learning, using tools, tools should exists to help not to create yet another thing to worry about.
This doesn’t mean all other code review tools are shitty, phabricator is a nice one, gerrit fit on some more complex workflows, etc… but let me introduce what my code review tool have:
An ugly logo
…and a name: Review it!.
Simple Web interface, just for code review, nothing more
The web interface is super simple, it allows you to see the various versions of the patch, accept, reject of comment on patch lines. Just this.
Accepted patches go to the git repository without need of any extra manual step.
Simple CLI interface for simple things
Send a merge request is a matter of type review push master, this mean: “Push the git commit on HEAD for review targeting the master branch.”
To update a merge request is even easier, review push.
See pending reviews? review list.
Open a merge request on your browser? review open ID.
Apply a merge request patch on your tree? review apply ID
Show a merge request patch without open the browser? review show ID
Oops, want to cancel a merge request? review cancel ID
The idea is simple, simple commands for simple things.
(almost) Zero configuration needed
To configure the CLI is also much simpler, go to the Web interface, copy and paste the command on your terminal (in the project directory), something like
Meique, my oldest pet project that still alive, was finally considered ready to get a 1.0 tag!
Meique is a C/C++ build system that aim to be simple to use, fast enough and whatever I would want. The project first commit on github dates from December 2009, and now after 5 years and 359 commits, it’s here, Enjoy!
Capistrano 2 had a feature that enabled deploy by copying the project tarball to the remote server instead of git cloning it from the remote server, Capistrano 3 doesn’t had this feature. The problem of cloning it from the remote server is that sometimes the remote server doesn’t have access to the git repository and adding access to it is not desirable.
Just a note, or rant: Capistrano isn’t a good example of well documented project and Ruby doesn’t have clear semantic on what is public API and what should be considered private API, so I’m not 100% what I did is a hack or a honest use of their API. Anyway this works with Capistrano 3.2.1.
The code, hack, solution, whatever you call it
In Capistrano 2 times the elders of Google told me that a “set :deploy_via, :copy” should be enough to do the job, with Capistrano 3 Google
just says it’s possible with few lines of code, but doesn’t say how.
The code bellow is in deploy.rb, hope you understand how it works by reading the comments.
# This is important, since the solution was tested only with 3.2.1lock'3.2.1'set:application,'Hello'# We will tell a white lie to Capistranoset:scm,:git# release id is just the commit hash used to create the tarball.set:project_release_id,`git log --pretty=format:'%h' -n 1 HEAD`# the same path is used local and remote... just to make things simple for who wrote this.set:project_tarball_path,"/tmp/#{fetch(:application)}-#{fetch(:project_release_id)}.tar.gz"# We create a Git Strategy and tell Capistrano to use it, our Git Strategy has a simple rule: Don't use git.moduleNoGitStrategydefchecktrueenddeftest# Check if the tarball was uploaded.test!" [ -f #{fetch(:project_tarball_path)} ] "enddefclonetrueenddefupdatetrueenddefrelease# Unpack the tarball uploaded by deploy:upload_tarball task.context.execute"tar -xf #{fetch(:project_tarball_path)} -C #{release_path}"# Remove it just to keep things clean.context.execute:rm,fetch(:project_tarball_path)enddeffetch_revision# Return the tarball release id, we are using the git hash of HEAD.fetch(:project_release_id)endend# Capistrano will use the module in :git_strategy property to know what to do on some Capistrano operations.set:git_strategy,NoGitStrategy# Finally we need a task to create the tarball and upload it,namespace:deploydodesc'Create and upload project tarball'task:upload_tarballdo|task,args|tarball_path=fetch(:project_tarball_path)# This will create a project tarball from HEAD, stashed and not committed changes wont be released.`git archive -o #{tarball_path} HEAD`raise'Error creating tarball.'if$?!=0onroles(:all)doupload!tarball_path,tarball_pathendendend# Attach our upload_tarball task to Capistrano deploy task chain.before'deploy:updating','deploy:upload_tarball'